Create Windows Vista like buttons using Photoshop
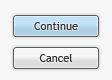
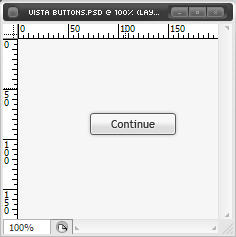
Support this website by purchasing prints of my photographs! Check them out here.Our result will look like the silver buttons which come with vista. The following picture is the result of the tutorial (I won't be adding a picture of the vista buttons as I made this tutorial on my girlfriends vista computer and forgot to screenshot them).
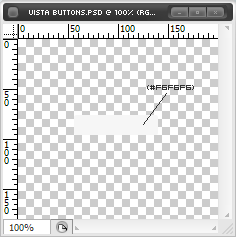
First of all, create a new document. Next, add a rounded recangle shape (Shift+U, Shift+U) with a corner radius of 2 pixels. Make the color of the shape very close to white, I chose F6F6F6.
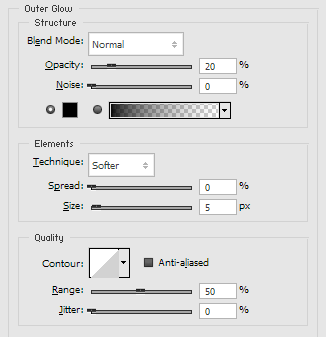
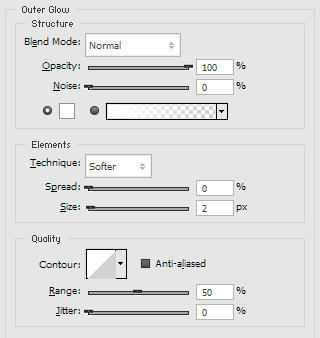
Right click on the shape layer we have just created and go to blending options. We will start with four blending options and will include a fifth for the hover effect. The first one to set up is the outer glow. This is optional but adds a subtle, sexy effect.Set the blend mode to normal, the opacity to 20% and the gradient to be black to transparent.

The next effect to add is the inner glow. This adds the 1 pixel lighter color around the edge. We don't want it to be too noticable, so set the size to 2px. Set the blend mode to normal, the opacity to 100%, and the color to white.
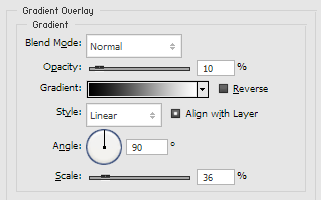
Next up we set the gradient overlay. This adds the shiny gradient to the back of the button. Leave the blend mode at normal and the colors from black to white. Set the transparency to 10% (most of the details are very subtle) and set the scale to about 36% (This makes the gradient more immediate instead of gradual).
Finally we'll be adding the darker line around the button. I the world of PS, this is called a stroke. We'll want it to be a thin, 1px line. We don't want it to be too dark, so set the color to 5B5B5B. Now we are done with the button part.

Now we'll add some text above the image. Choose whatever you want. Don't make the text too dark, I went with 313131. Center the text over the shape then open the blending options for the text. We are going to add a slight white glow to the text using outer glow. Normal, 100%, white, 2px should be good.
Press okay and we are now finished with the button.
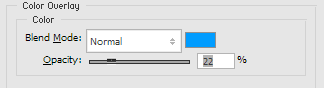
If you plan on adding a blue hue to the button when you mouse over it, continue reading, otherwise go home :p. Adding the color is done by adding another blending option to the shape.
To do this, go back to the blending options for the shape and enable the color overlay option. Set the color to a pretty blue, such as 009CFF, and set the opacity to about a quarter.
Press ok and your done. Your image should look something like this:

By either enabling or disabling the color overlay blending option you can save the image for normal or mouse hover use.
Thomas has contributed to dozens of enterprise Node.js services and has worked for a company dedicated to securing Node.js. He has spoken at several conferences on Node.js and JavaScript and is an O'Reilly published author.