How to generate a Self Signed SSL Certificate for lighttpd
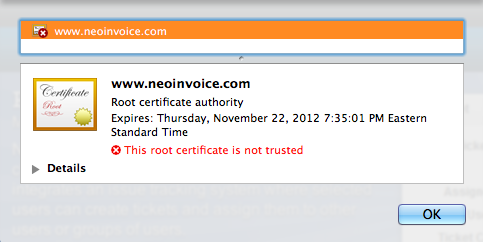
Support this website by purchasing prints of my photographs! Check them out here.For my NeoInvoice project, some of my users wanted a secure connection to the website. But, it's still in beta stages and I'm not charging, and I didn't want to spend too much money. So, generating a self signed SSL certificate seemed like the best solution. A (free) self signed certificate is just as encrypted as a (paid) certificate generated by a browser-trusted root authority. However, the clients browser will complain (since they don't acknowledge the entity which generated the certificate). For this reason, you don't want to use a self signed certificate for a production website as the browser messages will scare away customers. Here's what the info dialog shows in Chrome:

Anyway, here's how you generate the certificate. There are basically three steps, the first is to generate the certificate, then to tell lighttpd where the certificate is, and finally restart lighttpd.
Generating Certificate
When generating a certificate, it doesn't really matter where you put it. The certificate itself is a file which is a few kilobytes in size. You don't, however, want to put the certificate somewhere that you'll forget it. For this reason it's a good idea to put the certificate in the lighttpd server directory. If you have several websites running on your server and would like to use the certificate with more than one, you'll want to make a folder for all of them (so that things don't get messy).
cd /etc/lighttpd/
sudo mkdir certificates; cd certificates
sudo openssl req -new -x509 -keyout domainname.pem -out domainname.pem -days 365 -nodes
sudo chown www-data:www-data domainname.pem
sudo chmod 0600 domainname.pem
Configure lighttpd
Now that you've got a certificate, we'll want to tell lighttpd to enable SSL support and to use the certificate file.
sudo lighty-enable-mod ssl
cd /etc/lighttpd/conf-enabled/
sudo nano 10-ssl.conf
Once you're in the file, you'll add the lines pointing to the certificate file and setting the document root.
$SERVER["socket"] == "0.0.0.0:443" {
    ssl.engine  = "enable"
    ssl.pemfile = "/etc/lighttpd/domainname.pem"
    server.document-root = "/var/www"
}
Restart lighttpd
Now that we've got that out of the way, all we need to do is restart lighttpd. If you get any errors when it attempts to start the server again, check your files for syntax errros. If everything goes horribly wrong, just revert your changes to the 10-ssl.conf file.
sudo service lighttpd restart