Treating OpenBox like a Tiling WindowManager
Support this website by purchasing prints of my photographs! Check them out here.
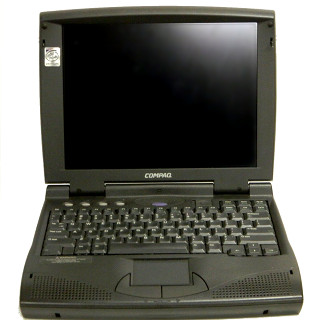
The first laptop I owned was a used Compaq Armada 1530DM with a 133 Mhz CPU, 80MB of RAM, and a 2.1GB HDD. The copy of Windows 95 which came with it was already uncomfortably slow. Eventually the I Love You virus sealed the fate of not only the Windows 95 install but also my confidence in Windows as an OS. The internet told me of a virus-immune alternative OS called Linux and my local department store happened to be selling Mandrake 7.2. It defaulted to KDE2, which was a little faster, but I eventually tried the quicker OpenBox. I've been using it ever since.
Despite my love of the simple UI, the mouse interactions have recently started slowing me down. I've tried pure tiling WMs in the past (checkout my i3 Configurator), but I never took the time to properly learn the nuances of a different WM. This post provides configurations to be a happy medium between using a true tiling WM and remaining on the familiar OpenBox WM.
The following configuration changes will require you to modify your OpenBox configuration file. This file exists on my machine at ~/.config/openbox/rc.xml.
Fullscreen and Undecorate Windows
By default, when a new application window is launched, it occupies some predetermined height and width and floats in the middle of the screen. This window is decorated with a top bar and a small border. To make OpenBox more like a tiling WM we'll want to remove these decorations. It would also be nice to have the window occupy the full screen, since we can't easily drag it around.
Add the application block within your openbox_config/applications block. If you don't already have an applications block you can add it before the closing </openbox_config> tag.
<applications>
  <application type="normal">
    <maximized>true</maximized>
    <decor>no</decor>
  </application>
</applications>
Once this is done all new “normal” windows—basically a draggable and resizable window—will be undecorated and be fullscreen. When you move your mouse to the top of the screen there is a 1px margin that you can right-click and still get the usual context menu.
Keyboard Shortcuts to Minimize and Maximize
Now that we've disabled the window toolbars, and the minimize/maximize buttons they provide us, we're going to want a keyboard equivalent for doing the same thing. Add the keybind blocks to your keyboard block.
<keyboard>
  <keybind key="W-k">
    <action name="ToggleMaximize"/>
  </keybind>

  <keybind key="W-j">
    <action name="Iconify"/>
  </keybind>

  <keybind key="W-q">
    <action name="Close"/>
  </keybind>
</keyboard>
The first section will toggle the maximized state of your window using the Super + k keybinding (W-k). I picked this because it feels familiar to my VIM hands, but switch it to anything else you'd prefer. You shouldn't need this much, but it will help when you get a very stretched looking calculator.
The next section will toggle the minimized (iconified) state of your window using the Super + j keybinding (W-j). It's like pressing down in VIM, feel free to change.
The final section will close the window using the Super + Q keybinding (W-q). By default you can close a window using Alt + F4, but this is much quicker.
Snap Windows to Screen Halves
Most WindowManagers—and alternative desktop Operating Systems—offer this feature to some degree. It's the ability for a window to easily occupy a single half of the screen. Some OSs support this by dragging a window and touching the edge of the screen. But, with this shortcut, we can quickly enable it by pressing a two-key combination.
<keyboard>
  <keybind key="W-Left">
    <action name="Unmaximize" />
    <action name="MoveResizeTo">
      <x>0</x>
      <y>0</y>
      <width>50%</width>
      <height>100%</height>
    </action>
  </keybind>

  <keybind key="W-Right">
    <action name="Unmaximize" />
    <action name="MoveResizeTo">
      <x>-0</x>
      <y>0</y>
      <width>50%</width>
      <height>100%</height>
    </action>
  </keybind>

  <keybind key="W-Up">
    <action name="Unmaximize" />
    <action name="MoveResizeTo">
      <x>0</x>
      <y>0</y>
      <width>100%</width>
      <height>50%</height>
    </action>
  </keybind>

  <keybind key="W-Down">
    <action name="Unmaximize" />
    <action name="MoveResizeTo">
      <x>0</x>
      <y>-0</y>
      <width>100%</width>
      <height>50%</height>
    </action>
  </keybind>
</keyboard>
These keyboard shortcuts will take the currently focused window and make it occupy the left, right, top, or bottom half of the screen, by pressing Super + Left, Super + Right, Super + Up, or Super + Down keyboard combination.
Jump Between Desktops
Now that we're able to quickly organize windows on our desktop, let's make it easy to jump between multiple desktops. The following configuration will give us 4 different virtual desktops, keybindings to jump between them, and keybindings to relocate windows between them.
<desktops>
  <number>4</number>
</desktops>

<keyboard>
  <keybind key="W-1">
    <action name="GoToDesktop">
      <to>1</to>
    </action>
  </keybind>
  <keybind key="W-2">
    <action name="GoToDesktop">
      <to>2</to>
    </action>
  </keybind>
  <keybind key="W-3">
    <action name="GoToDesktop">
      <to>3</to>
    </action>
  </keybind>
  <keybind key="W-4">
    <action name="GoToDesktop">
      <to>4</to>
    </action>
  </keybind>

  <keybind key="W-S-1">
    <action name="SendToDesktop">
      <to>1</to>
    </action>
  </keybind>
  <keybind key="W-S-2">
    <action name="SendToDesktop">
      <to>2</to>
    </action>
  </keybind>
  <keybind key="W-S-3">
    <action name="SendToDesktop">
      <to>3</to>
    </action>
  </keybind>
  <keybind key="W-S-4">
    <action name="SendToDesktop">
      <to>4</to>
    </action>
  </keybind>
</keyboard>
Pressing Super + 2 (W-2) will take us to desktop #2. Pressing Super + Shift + 2 (W-S-2) will move the currently active window to desktop #2 also display the desktop. Of course, if you'd like to enable more than 4 desktops, you'll need to change the desktops/number value, and add more entries to the keyboard list.
Caveats
This isn't quite as awesome as using a pure tiling WM. For example, while viewing a particular desktop, it's easy to get multiple windows stacked behind your active window. You can Alt + Tab between them, but in an ideal tiling WM situation we'd be able to move between visible windows using a modifier key and an arrow key.
But, if you're lazy like me, this configuration is a convenient step on the journey to adopting a true tiling Window Manager.
Thomas has contributed to dozens of enterprise Node.js services and has worked for a company dedicated to securing Node.js. He has spoken at several conferences on Node.js and JavaScript and is an O'Reilly published author.